Drying a Maltipoo Before the Coat Knots
There are few things as frustrating as seeing your sweet Maltipoo come out of the bath looking clean, only to realize that dampness and movement have turned their beautiful coat into a tangled mess of knots and mats. It feels like you just undid all your hard work, and the thought of trying to brush those out can be truly disheartening for both you and your little friend. This comprehensive guide will walk you through the precise steps and techniques you need to master drying your Maltipoo properly, ensuring their coat stays smooth, knot-free, and healthy after every bath.
The Critical Link Between Wet Hair and Matting in Maltipoos
Understanding why wet hair is such a problem for your Maltipoo's coat is the first step in preventing mats. It’s not just about a little tangling; it’s a fundamental characteristic of their unique hair type.
Why Wet Hair Is a Mat Magnet for Your Maltipoo
Maltipoos inherit their luscious, low-shedding coats from both the Maltese and the Poodle. This means they often have a soft, fine, and sometimes curly or wavy texture that, while beautiful, is incredibly prone to matting. When this type of hair gets wet, a few things happen simultaneously that create the perfect storm for knots. First, the individual hair strands swell with water, and their natural texture—whether it’s wavy, curly, or even straight but fine—causes them to intertwine much more easily than when dry. Imagine trying to untangle wet yarn; it’s far more difficult than dry yarn because the fibers cling to each other.
As the water starts to evaporate, these intertwined strands begin to "felt" together. This process compacts the hair, forming dense, painful clumps right against your Maltipoo's skin. The longer the hair stays wet and unattended, the tighter and more severe these mats become. It's a progressive problem: a small tangle missed during drying can quickly turn into a significant mat by the time the coat is fully dry. That's why simply allowing your Maltipoo to "shake it off" or air-dry on their own is practically an invitation for a matting disaster with this particular breed.
The Hidden Dangers of Leaving a Maltipoo to Air Dry
Beyond the obvious aesthetic issue of a matted coat, there are significant health and comfort implications for your Maltipoo if you leave them to air dry. The most immediate danger is skin irritation and infection. Trapped moisture beneath mats creates a warm, damp environment that is a breeding ground for bacteria and yeast, leading to conditions like hot spots, dermatitis, and other painful skin infections. These can be incredibly itchy and uncomfortable for your dog, often requiring costly vet visits and medication to clear up.
Furthermore, mats themselves are physically painful. As the wet hair dries and tightens, it pulls on your Maltipoo's delicate skin. Imagine having your hair constantly tugged; that's what your Maltipoo experiences. Severe mats can even restrict movement, causing your dog to limp or refuse to be touched in certain areas. In extreme cases, mats can pull so tightly that they cut off circulation, or cause skin tears and necrosis underneath. It's not just about vanity; it's about your Maltipoo's well-being. A constantly damp coat also contributes to that distinctive "wet dog" smell, which can linger long after the bath, even when the surface of the coat feels dry. This indicates moisture is still trapped deeper within the dense undercoat or matted areas. This is why thorough, complete drying is so crucial for a Maltipoo.
Essential Tools for a Knot-Free Drying Experience
Having the right tools at your disposal makes all the difference when it comes to effectively drying your Maltipoo without causing mats. Don't underestimate the impact of quality equipment here.
Absorbent Towels and Microfiber Wonders
The very first step in drying your Maltipoo is to remove as much excess water as possible using towels, and not just any towels. Standard cotton bath towels are okay, but microfiber towels are truly a game-changer for Maltipoo owners. Microfiber is engineered to be incredibly absorbent, far more so than traditional cotton, allowing it to wick away a large volume of water quickly. This significantly reduces the overall drying time with the blow dryer and lessens the chance of mats forming.
When towel drying, the technique is crucial: blot, don't rub. Vigorously rubbing your Maltipoo's coat with a towel will only create more tangles and potential mats. Instead, gently squeeze and blot the water out, especially from longer sections like the ears, legs, and tail. You might find it helpful to have two or three microfiber towels on hand, especially if your Maltipoo has a very thick coat or if you're bathing a larger Toy or Miniature Maltipoo. The goal here is to get them damp, not dripping wet, before moving on to the next step.
The Right Blow Dryer for Your Maltipoo's Delicate Coat
This is perhaps the most critical tool in your mat-prevention arsenal. Using a human hair dryer on your Maltipoo is generally not recommended, and can actually be quite dangerous. Human dryers often reach very high temperatures that can easily burn a dog's sensitive skin, which is much thinner than ours. They also don't have the airflow necessary to effectively separate and dry a dense dog coat.
Instead, invest in a pet-specific blow dryer. There are two main types to consider:
- Force Dryers (High-Velocity Dryers): These are what professional groomers use. They emit a powerful, concentrated stream of cooler air that literally "forces" water off the coat. This high velocity helps to straighten the hair strands and separate them, preventing mats from forming, and significantly speeds up drying time. While they can be a bit noisy, most Maltipoos can be desensitized to them with patient introduction. You can find excellent options for pet force dryers from retailers like Chewy or Amazon.
- Stand Dryers: These are hands-free dryers that allow you to use both hands for brushing while your Maltipoo is being dried. They typically offer variable heat and speed settings, allowing for a gentler approach if your Maltipoo is particularly sensitive to noise or direct airflow.
Regardless of the type, always use your pet dryer on a low or cool heat setting. The primary goal is airflow, not extreme heat. Keep the dryer moving constantly, never focusing on one spot for too long, to prevent any risk of overheating or burning your Maltipoo's skin.
Brushes and Combs: Your Mat-Prevention Arsenal
Drying and brushing go hand-in-hand for a Maltipoo. You'll need a combination of tools to get the job done right.
- Slicker Brush: This is your primary tool for detangling and fluffing the coat during drying. Look for one with fine, bent wire bristles. The slicker brush helps to get down to the skin, separating individual hairs and preventing them from clumping. Use a gentle, sweeping motion, always brushing away from the skin.
- Metal Comb (Greyhound Comb): An absolute must-have. This comb typically has two sections: one with wider teeth and one with finer teeth. It's invaluable for checking your work and finding any small tangles or mats that the slicker brush might have missed, especially in those notorious problem areas like behind the ears, in the armpits, and around the tail. You should be able to run this comb smoothly through the entire coat, from root to tip, once it's dry.
- Pin Brush (Optional): Some owners find a pin brush useful for longer, straighter Maltipoo coats, as it can be gentler than a slicker for initial detangling or for fluffing once the coat is mostly dry. However, it's not as effective as a slicker brush for breaking up developing mats or getting down to the skin.
Remember, these tools are used during the drying process, not just before or after. The constant brushing as you dry is what prevents the mats from forming in the first place. You'll be using one hand for the dryer and one hand for the brush, a skill that comes with practice.
Step-by-Step Guide to Drying Your Maltipoo Without Knots
Now that you have your tools ready, let's walk through the drying process step by step to ensure a smooth, mat-free finish for your Maltipoo.
Post-Bath Prep: The First Line of Defense Against Mats
The moments immediately following the bath are crucial in your fight against mats. Don't delay the drying process.
First, as mentioned earlier, immediate and thorough towel drying is key. Use your absorbent microfiber towels to gently blot and squeeze as much water out of your Maltipoo's coat as possible. Pay extra attention to the legs, tail, and especially the longer hair on the ears and face. The less water that's in the coat when you start blow-drying, the quicker and easier the entire process will be, and the less chance there is for initial tangles to set in.
Next, a light detangling spray can be incredibly helpful. Spritz a small amount over the damp coat. These sprays often contain conditioners that lubricate the hair, making it easier for your brush to glide through and preventing friction that can lead to tangles. This added slip makes a huge difference in how smoothly your slicker brush will perform in the subsequent steps. You don't need to drench the coat, just a light, even mist.
Finally, do a brief pre-brushing session with your slicker brush. While the coat is still damp (but not soaking), gently brush through small sections to work out any larger tangles that might have formed during the bath itself. This initial pass makes the blow-drying and simultaneous brushing much more manageable, as you won't be battling significant knots while trying to operate the dryer. Take your time, be gentle, and praise your Maltipoo for their cooperation.
The Art of Blow Drying: Section by Section
This is where the real work—and the real mat prevention—happens. The key here is to work systematically, section by section, ensuring each part of the coat is completely dry and brushed out before moving on.
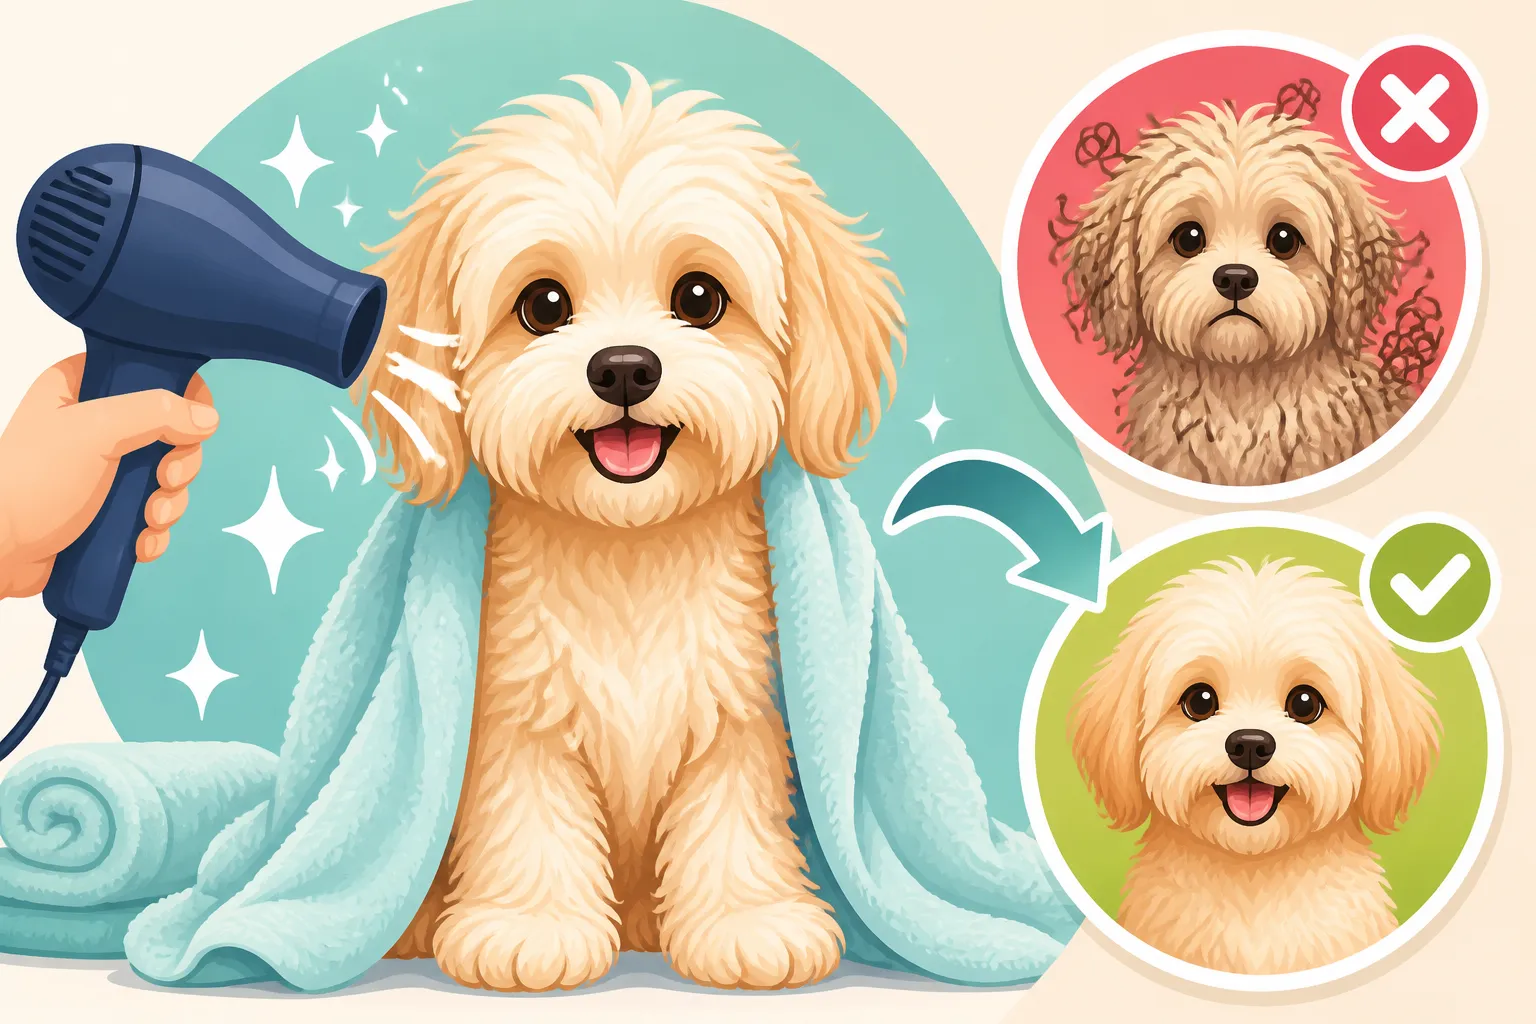
Start with your Maltipoo’s paws and legs, then move to the tail, then the body, and finally the head and ears. This progression helps your Maltipoo get used to the dryer, as the paws are often less sensitive than the face. Hold the pet dryer in one hand, always keeping it moving, and your slicker brush in the other.
As you dry, use the brush to lift and separate the hair. Brush against the direction of hair growth to ensure the air reaches down to the skin. This is vital because if the undercoat or the hair closest to the skin remains damp, it will mat as it dries, even if the outer layer feels fluffy and dry. Imagine painting a wall; you want to get right down to the surface, not just skim the top. Your goal is to achieve this level of separation and dryness.
Pay extra close attention to known problem areas where mats frequently form:
- Behind the ears: This spot is incredibly prone to matting because of friction and the fine hair. Make sure to thoroughly dry and brush this area. Mats Behind a Maltipoo's Ears are a common headache.
- Armpits and groin area: Again, friction and fine hair make these areas notorious for tangles. Lift your Maltipoo's legs gently to access these spots.
- Tail base: The hair here can be quite dense.
- Under the harness area: If your Maltipoo wears a harness regularly, this can cause extra friction and matting, so ensure it's well-brushed. Why a Maltipoo Mats Where the Legs Meet the Body explains how movement contributes to matting in these areas.
Throughout the process, periodically feel your Maltipoo's skin with your free hand to ensure it's not getting too warm. If you’re using a force dryer, point the nozzle away from their face and ears to minimize discomfort, especially at first. Patience and reassurance are your best friends here. Break the drying into short sessions if your Maltipoo gets stressed, or offer a tiny, high-value treat for cooperation.
The Final Check: Ensuring Every Strand is Dry and Smooth
Once you believe your Maltipoo's coat is fully dry and fluffy, it's time for the ultimate mat-detection test: the metal comb. This step is non-negotiable and crucial for a truly mat-free outcome.
Take your metal comb and systematically work through your Maltipoo's entire coat, section by section, from root to tip. Start at a small section, comb down, and if the comb catches, stop and gently work out the tangle with your fingers and the slicker brush until the comb glides smoothly. You should be able to comb through the entire length of the hair, all the way down to the skin, without encountering any resistance. If the comb snags, it means there's either a damp spot or a hidden tangle.
Don't skip any areas. Pay particular attention to all the spots mentioned previously—behind the ears, under the legs, around the tail, and anywhere the coat is thicker or longer. Any dampness or missed tangle, no matter how small, will almost certainly turn into a full-blown mat as the last bits of moisture evaporate. This final comb-through isn't just about identifying problems; it's about making sure every single strand is separated, smooth, and dry. This attention to detail is what separates a good home groom from one that leads to painful matting.
It's a process that demands patience. If your Maltipoo is getting antsy, take a short break, offer a quick cuddle, and then resume. Rushing this final check is a common mistake that can undo all your hard work.
Maintaining a Mat-Free Maltipoo Between Baths
Preventing mats isn't just about what happens on bath day; it's an ongoing commitment. What you do between baths is just as important, if not more so, for keeping your Maltipoo's coat in pristine condition.
Daily Brushing: The Non-Negotiable Routine
For a Maltipoo, daily brushing is not a suggestion; it's an absolute necessity. Their fine, silky, and often wavy or curly coat is a magnet for tangles and mats, even without getting wet. Regular friction from movement, collars, harnesses, and even just sleeping can cause small knots to form. If left unaddressed for even a day or two, these small knots can quickly escalate into tight, painful mats that require professional dematting or, in severe cases, shaving. How Many Times a Week a Maltipoo Needs Combing really depends on the individual coat, but daily is ideal.
The most effective technique for daily brushing is called "line brushing." This involves parting the hair and brushing in small sections, working from the bottom layer up. You use your slicker brush to gently brush the hair outwards, making sure you reach all the way down to the skin. Then, follow up with your metal comb to ensure there are no tangles missed.
Incorporating a good quality detangling spray or a conditioning mist during your daily brushing sessions can also be highly beneficial. These products help to moisturize the hair, reduce static, and provide extra slip, making the brush glide through more smoothly and further preventing new tangles from forming. Brands like Chewy and Amazon offer a wide array of options for detangling and conditioning sprays specifically formulated for dogs. This consistent effort ensures that when bath time does roll around, the coat is already largely tangle-free, making the drying process infinitely easier and less stressful for both of you.
Regular Grooming Appointments: A Professional Touch
While home care is paramount, professional grooming appointments are an invaluable part of maintaining a Maltipoo's coat. Most Maltipoos benefit from a professional groom every 4 to 8 weeks, depending on their coat type, lifestyle, and your ability to maintain their coat at home.
Professional groomers have specialized tools, such as high-velocity force dryers, various types of shears, clippers, and conditioning treatments, that are simply not available to the average pet owner. Their expertise in handling different coat types and temperaments means they can efficiently and effectively remove any minor mats, trim the coat to a manageable length, and provide a thorough bath and dry that you might struggle to replicate at home. They can also safely address delicate areas like the face, paws, and sanitary areas. What a Maltipoo Puppy's First Trim Costs can vary, but it's an investment in a healthy, happy coat.
Think of professional grooming as a complementary service to your home care, not a replacement. A good groomer can also offer tailored advice on home brushing techniques, recommend specific products for your Maltipoo's unique coat, and help you recognize potential skin or coat issues early on. They are an essential partner in keeping your Maltipoo looking and feeling their best.
Recognizing and Dealing with Emerging Knots
Even with diligent daily brushing and regular professional grooms, a Maltipoo's coat can still develop small tangles. The key is to catch them early before they have a chance to solidify into painful mats.
During your daily brushing, if you feel a snag with your slicker brush or comb, don't ignore it. This is an emerging knot. To deal with it, first, isolate the tangle by gently holding the hair at the base of the mat close to the skin. This prevents the pulling sensation from hurting your Maltipoo. Then, apply a generous amount of detangling spray directly to the knot. Using your fingers, try to gently pull apart the strands of hair. Once the mat is a bit looser, you can use the corner of your slicker brush or the fine-toothed side of your metal comb to pick at the edges of the mat, working slowly from the outside in, rather than trying to comb through the middle. Patience is crucial here.
It's important to know when a mat is too severe for home removal. If a mat is tight against the skin, large, or causes your Maltipoo pain when you try to work on it, it's time to call a professional groomer or veterinarian. Attempting to forcefully remove severe mats at home can cause significant pain, skin irritation, or even injury to your dog. In some cases, a mat may be so dense that the only humane option is to carefully shave it out. Working a Mat Out of a Maltipoo's Coat can be a delicate process, and knowing your limits is vital for your Maltipoo's comfort and safety.
| Drying Method/Tool | Pros | Cons | Best For |
|---|---|---|---|
| Microfiber Towels | Highly absorbent, gentle, inexpensive | Doesn't fully dry, still requires blow dryer | Initial water removal, sensitive areas like face |
| Pet Force Dryer | Fastest drying, separates hair, prevents mats | Can be noisy, requires training/desensitization, higher initial cost | Thick coats, efficient full body drying, professional-level results |
| Pet Stand Dryer | Hands-free, variable heat/speed, less noisy | Slower drying than force dryer, takes up space | Nervous dogs, owners who want to brush with both hands, longer drying sessions |
| Slicker Brush | Essential for detangling and fluffing | Can be harsh if used incorrectly, doesn't always reach deep mats | During blow drying, daily brushing, general coat maintenance |
| Metal Comb | Excellent for mat detection, getting to skin | Not for initial detangling, can pull if coat isn't pre-brushed | Final mat check, detailed work on sensitive areas, between-bath maintenance |
Disclaimer
This article is for general informational purposes only and does not constitute professional advice. Laws, prices and regulations vary by location and change over time. Consult a qualified professional for guidance on your specific situation.